DIY Christmas Coasters
Christmas is getting closer and closer and I truly can’t believe it’s already the end of the year. Where did all the time go? I’m behind on my Christmas shopping and need to get my gifts in order because Christmas will be here and it will catch me by surprise if I’m not careful.
This year, my family and I decided that making a few gifts would not only be fun and provide some quality family time, but it would make the gifts more special as well as cheaper.
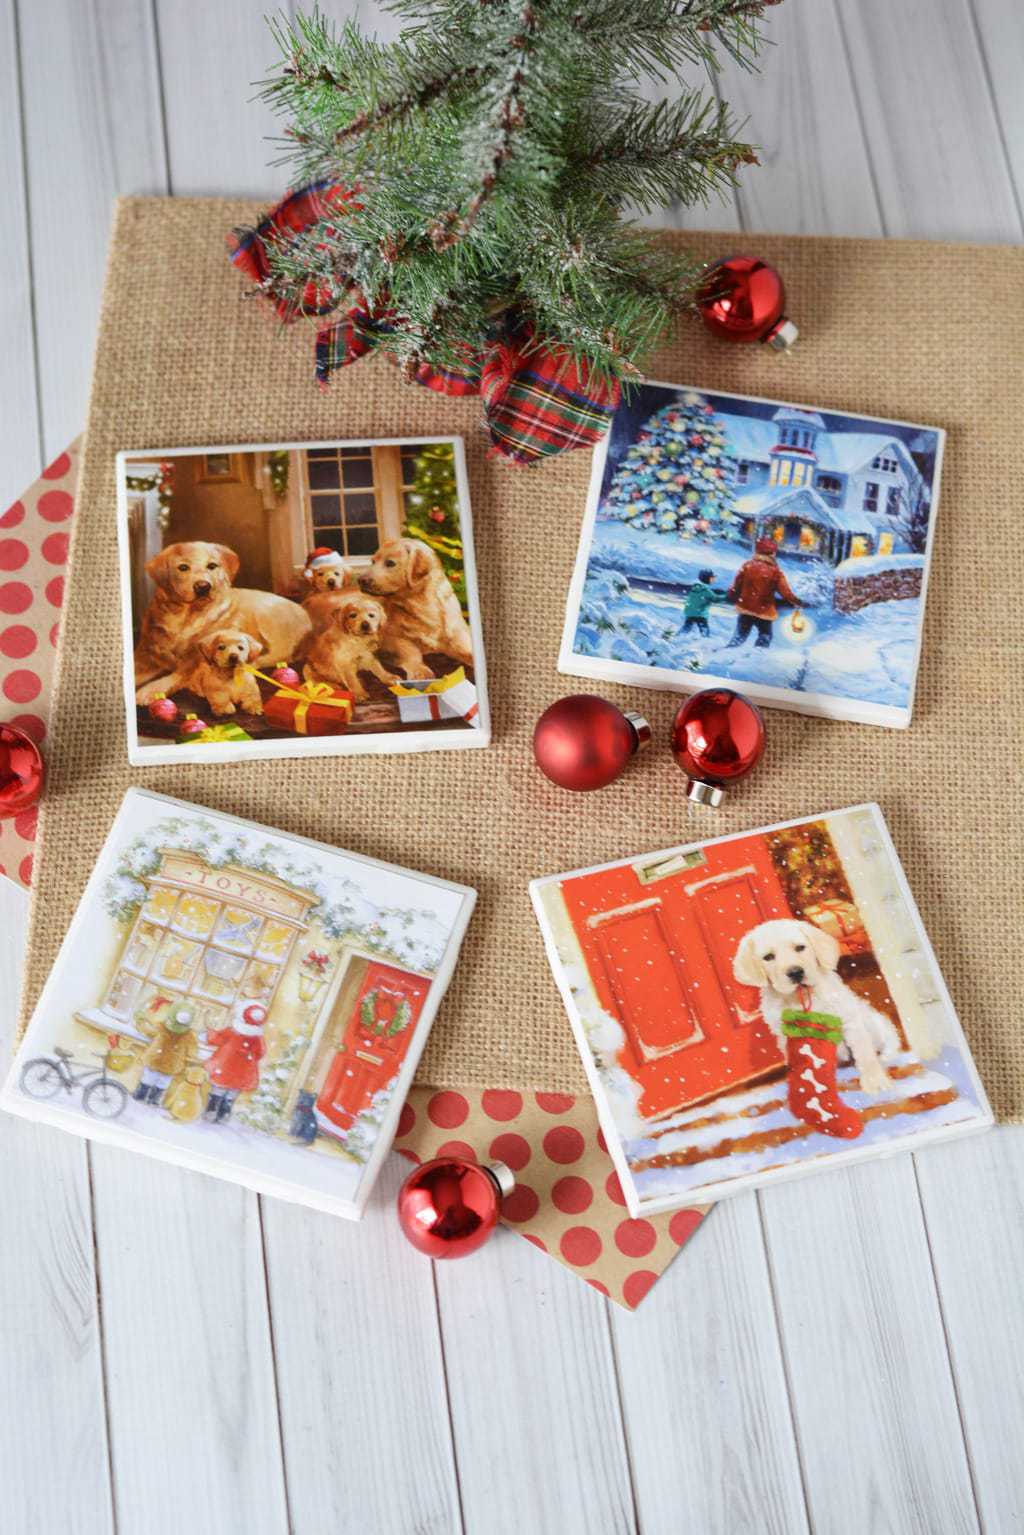
Buying for dozens of people can get expensive and feel impossible so making the gifts as part of our solution. One of the gifts we came up with and adore (we made some for ourselves) are these DIY Christmas coasters made out of old Christmas cards and tile squares!
So, don’t throw away those random Christmas cards, put them to good use and make a gift out of them! These coasters are easy enough that the entire family can get in on making them.
The greatest part is that each one is different and unique unless you want them to match. If you do, you can always buy those matching packs of Christmas cards. Either way, this is a fun and easy gift to make that is sure to make friends and family happy.
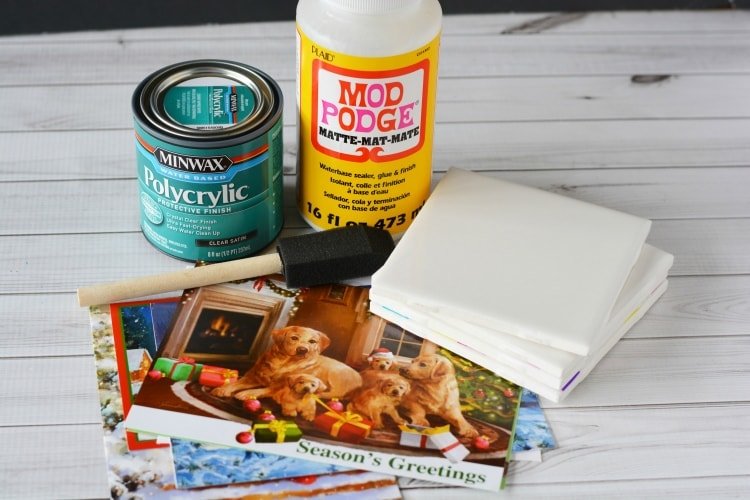
Materials Needed:
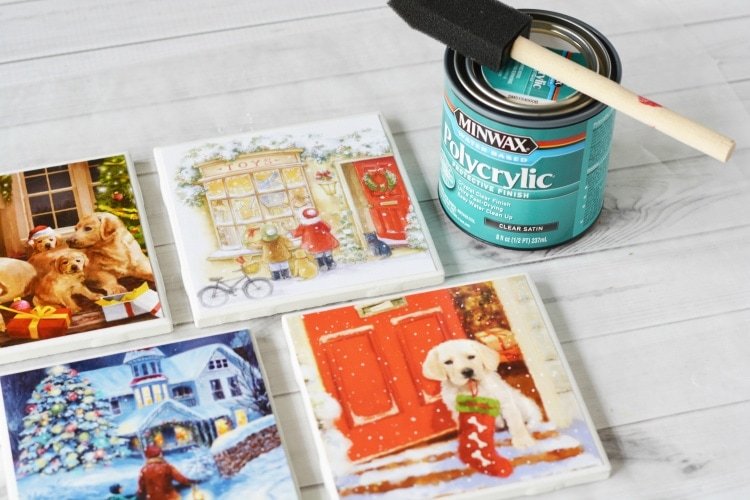
- 4, 4.25″ square ceramic tiles–the tag at the store will most likely call these 4″ square tiles, but they really measure 4.25″ square.
- 4 old or inexpensive Christmas cards
- Foam Sheet (or felt)
- Minwax Polycrylic
- Mod Podge
- Foam Brushes/Paint Brushes
- Hot Glue
- Scissors
- Paper Trimmer
- Pan Scraper or Credit Card
Directions:
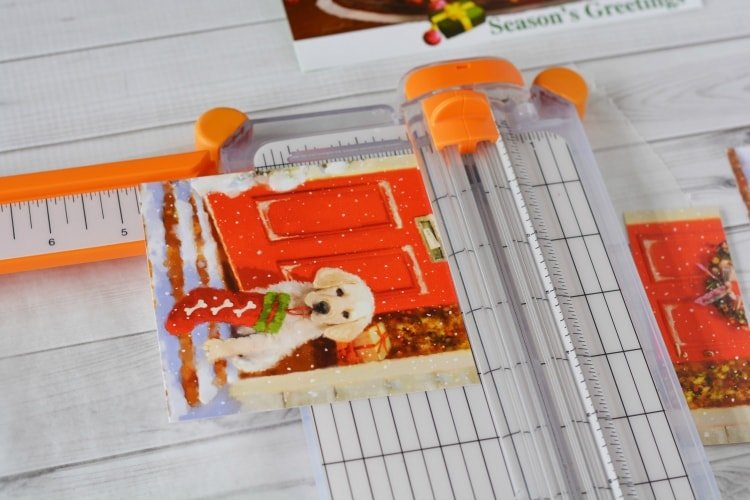
Use a paper trimmer to cut each card into a 4″ x 4″ square. Make sure the card fits onto the tile before you adhere it. You may have to trim them a little bit smaller.
On a flat protected surface, spread mod podge onto your tiles. Add the card and let it set.
In about a minute. At this point, the card will begin to curl on the edges.
Use your pan scraper or credit card to smooth out the card from the center to the edges, wiping away any excess mod podge that oozes out on the edges.
This will remove wrinkles and the edges will then stick to the tile and adhere flat.
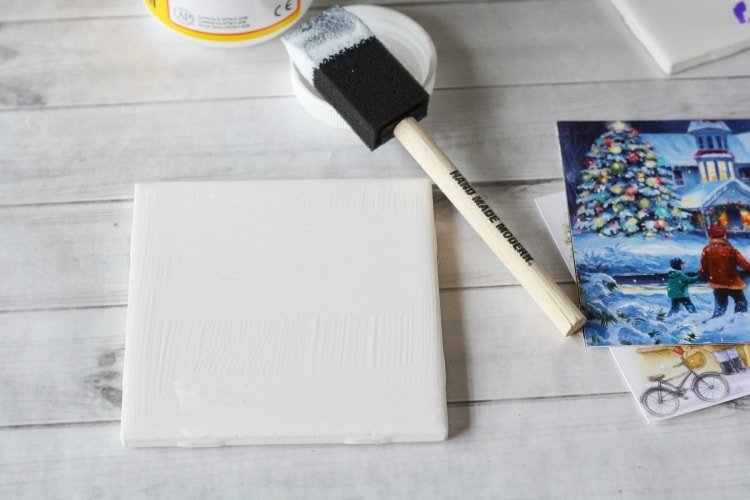
Repeat until all 4 coasters are covered. Let set to dry for at least 2-4 hours.
On a protected surface, coat each coaster with a thin coat of Minwax Polycrylic.
This will make your coasters waterproof. Let dry for 2 hours and repeat with a second coat and third if desired.
Cut four pieces of foam or felt about 4″ square to fit onto the bottom of your coasters.
Use hot-glue to affix them and press firmly. This will prevent them from scratching your table.

Don’t forget to order your materials to make these pretty Christmas coasters!


This is a super cute idea and would make a great gift.
These are precious! It actually seems like something I could possibly do:)
These are so cute!! Would they work with normal photos?? If so I think I found my Christmas gifts for next year!!
This is to cute and clever. I love to moshposh sorry for they typo lol. But ever since I was a young girl I remember my mom doing this with napkins. It really does make things come alive.
I love this idea for a craft to do with my family. I always wonder what to do with all the Christmas cards I receive and now I can stop hoarding them in boxes and make them into gifts.
These are awesome!
Fun to do over the long winter.
These are so cute! I would love to make these with my daughter!